Roasting with a GENECAFE CBR 101
Roasting is a crucial step that reveals the full quality of good green coffee. It’s a true art: a great cru poorly roasted becomes a mediocre coffee. Conversely, coffee roasted several weeks ago loses its aromas and produces little crema.
Of course, we can buy our coffee from a roaster who, through slow and controlled roasting, ensures the quality of the bean and guarantees its freshness.
But curiosity pushed me to experiment with roasting myself, to trace my own curves, to compare, to refine and to build my experience. Being an actor in the entire preparation chain is an exciting reason to start roasting.
Understanding roasting
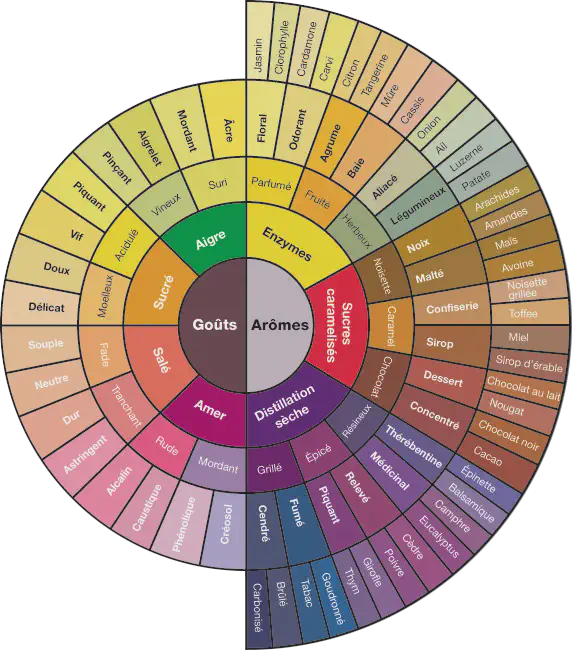
A coffee bean can develop up to 700 aromas and components.
To succeed, you need: good green coffee, reliable equipment, and particular attention to the signals from the bean. Professional roasters have sophisticated programmable machines, but it’s possible to get started at home with suitable equipment.
The main stages of roasting
When the bean is heated, it follows a progressive transformation curve. Here are the essential stages:
1. Water evaporation
Green coffee contains up to 15% moisture. The first phase consists of evaporating it, which prepares the bean for the following transformations.
Indicative duration: approximately 10 minutes.
2. Bean transformation
The bean swells, begins to brown and releases its oils. The specific aromas linked to the origin develop.
Around 180°C – 200°C, the chaff detaches.
3. The first crack – decisive phase
Around 200°C, the bean cracks like popcorn: this is the famous first crack. A fissure forms in the middle of the bean.
With the GeneCafé CBR 101, this sound is difficult to hear because of the fan, so you need to monitor it visually.
This is where you decide to stop or continue: the darker the bean, the more bitterness sets in and acidity disappears.
The second crack (beyond 212°C) should generally be avoided as it burns the aromas and can give an unpleasant taste.
4. Cooling
To stop the roasting, the bean must be cooled quickly.
The GeneCafé CBR 101 has an automatic cooling phase, but you can also remove the beans and ventilate them.
It is recommended to let the coffee degas for at least 3 days after roasting.
Which roasting profile to choose?
The color of the bean determines the cup profile. Here are the main benchmarks:
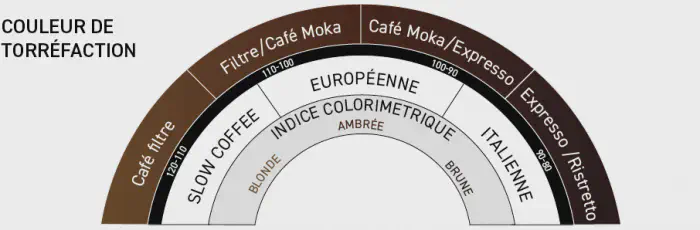
- Light roast: light coffee, fruity, very acidic – approx. 14 min.
- Medium roast: smoother, spice notes – 15 to 17 min.
- Full city roast: balance between intensity and bitterness – 18 to 19 min.
- Dark brown / Italian: full-bodied coffee, no acidity, very persistent – 20 to 23 min.
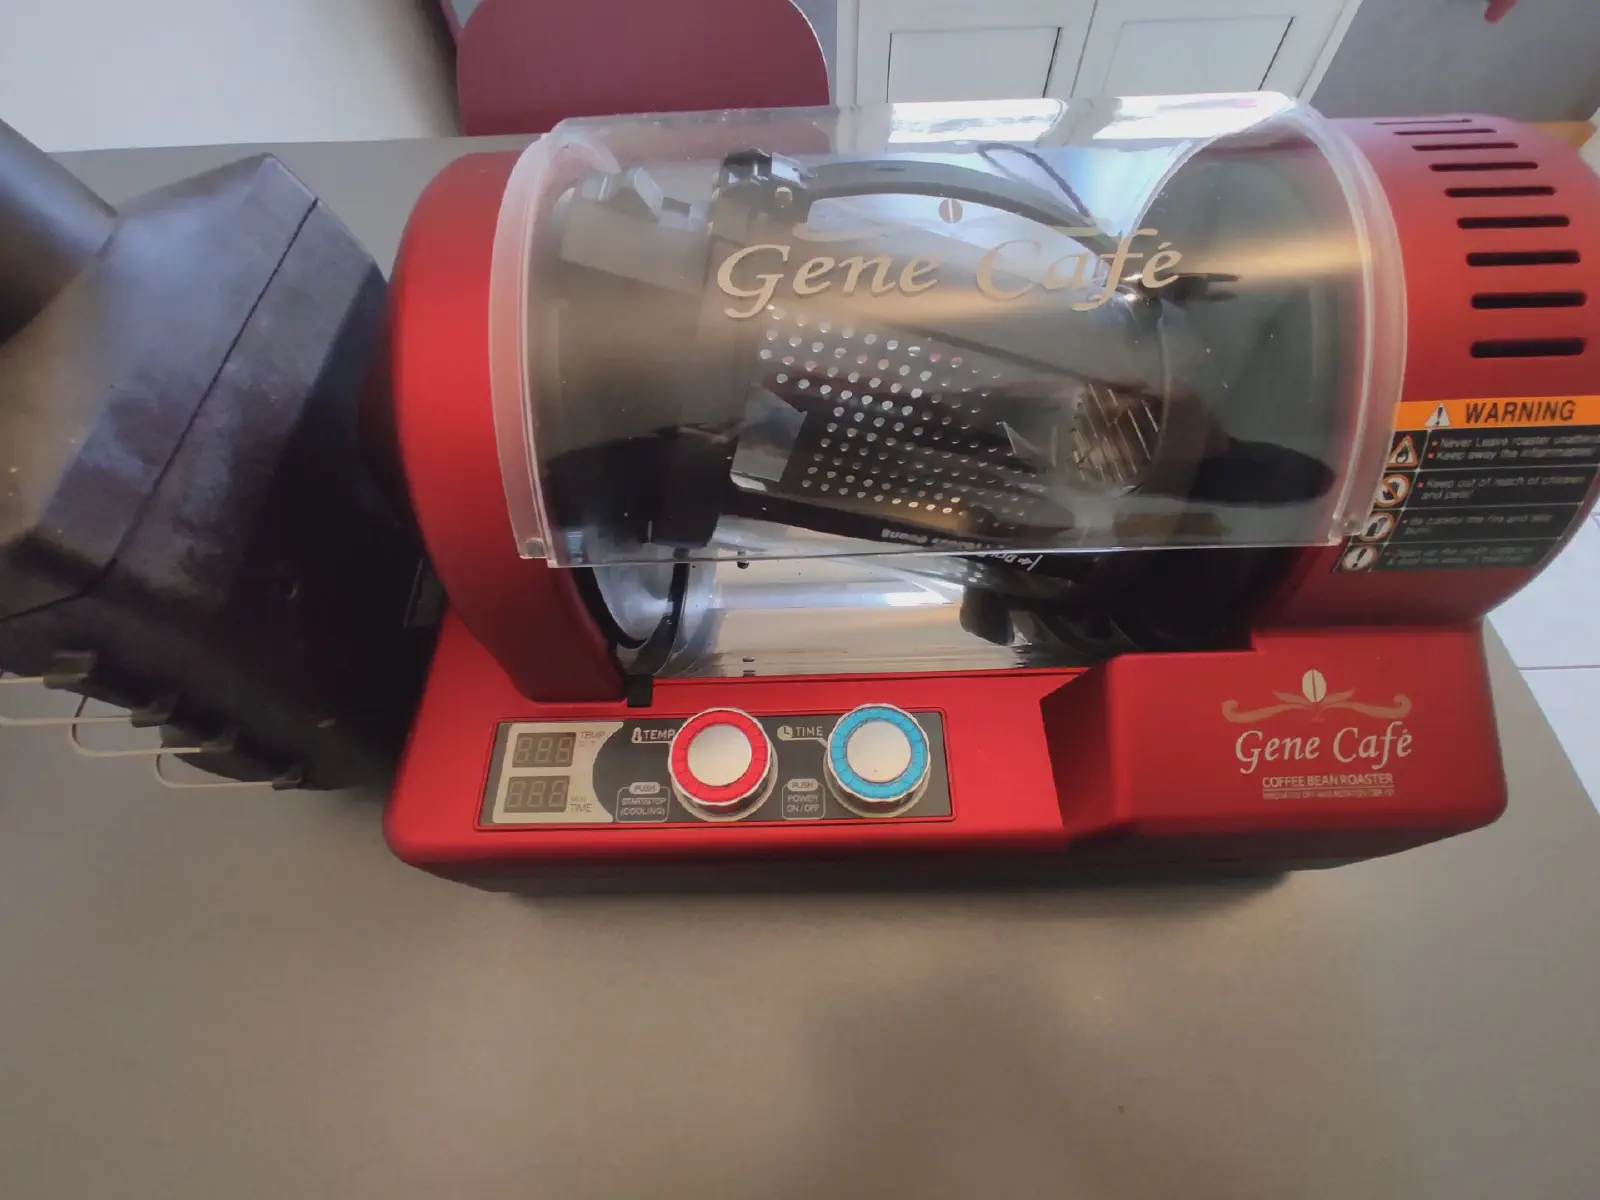
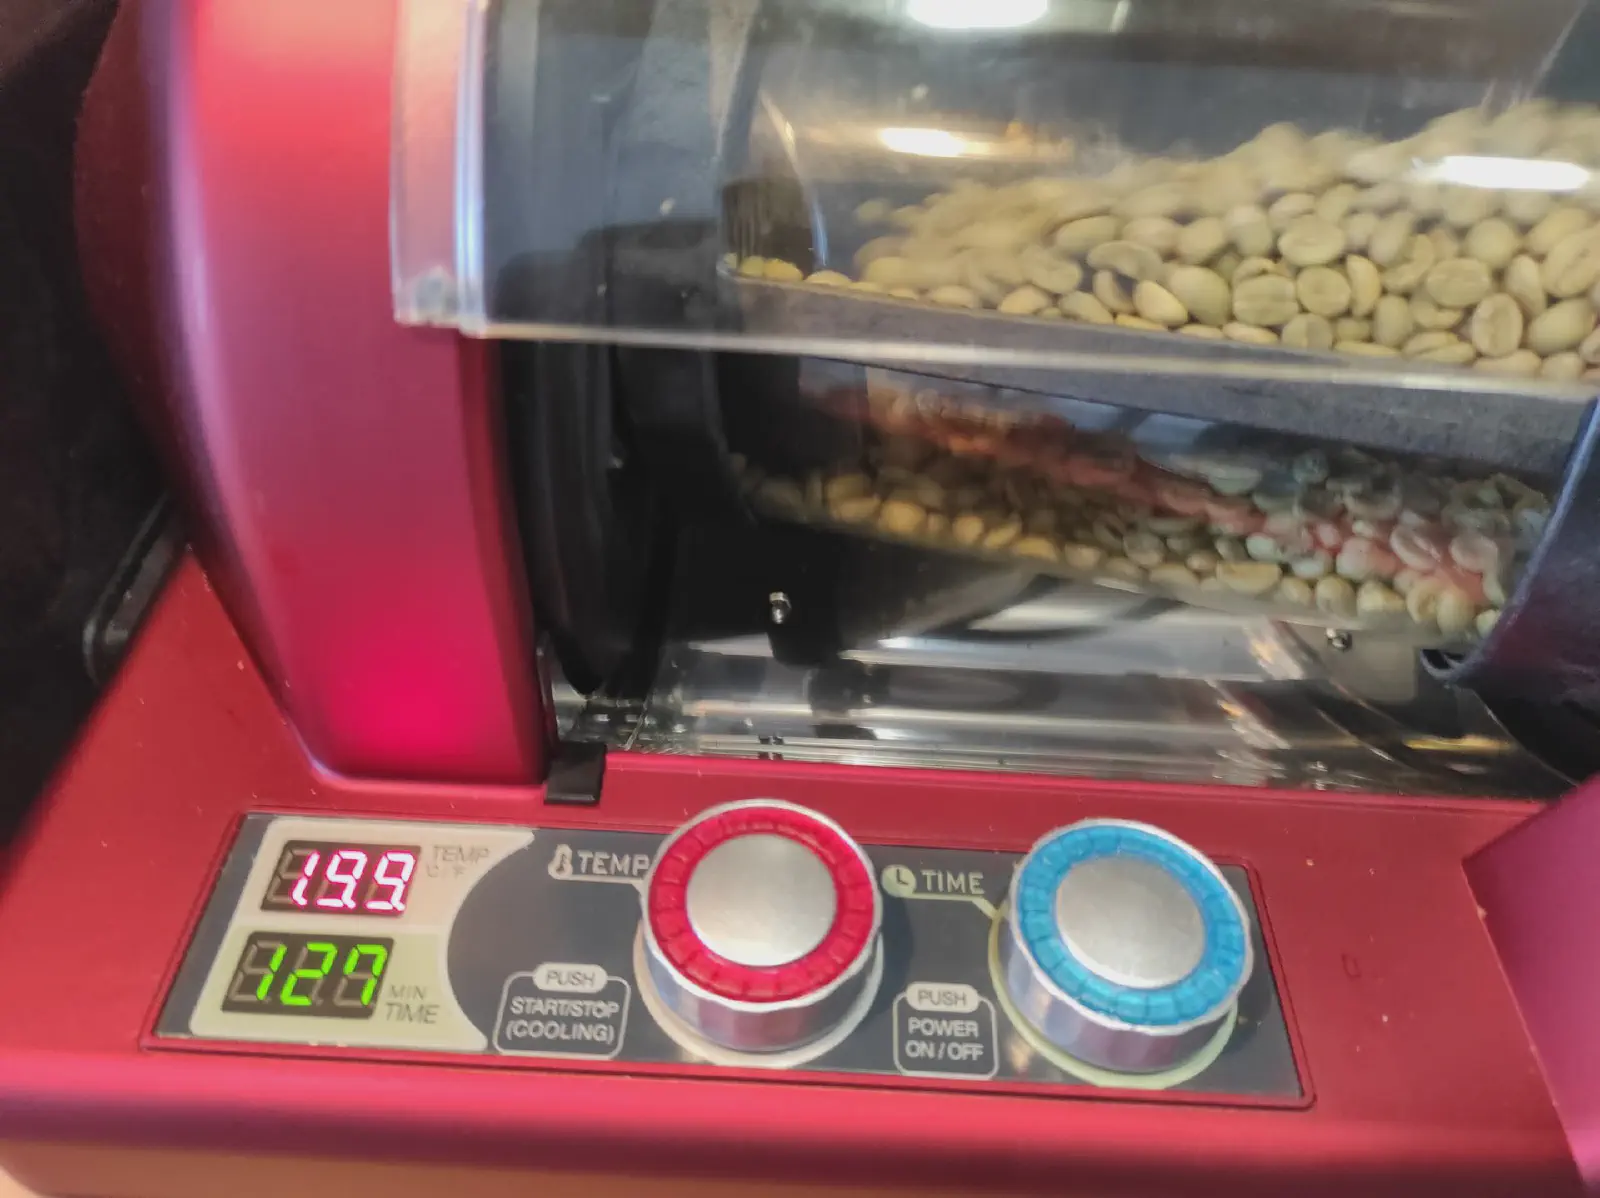
My choice: the GeneCafé CBR 101
The market offers various home roasters. Often expensive and limited in capacity, many don’t exceed 80 g per cycle.
I opted for the GeneCafé CBR 101, which can process up to 300 g of green coffee per roast. After water loss, this yields approximately 230 to 250 g of roasted coffee.
Main Features
- Indirect hot air heating
- Power: 1300 W
- Reasonable noise level: 65 dB
- Adjustable temperature up to 250°C
- Timer from 0 to 30 minutes
- Capacity: up to 300 g of green coffee
A control menu allows you to adjust time and temperature during the cycle, with automatic cooling.
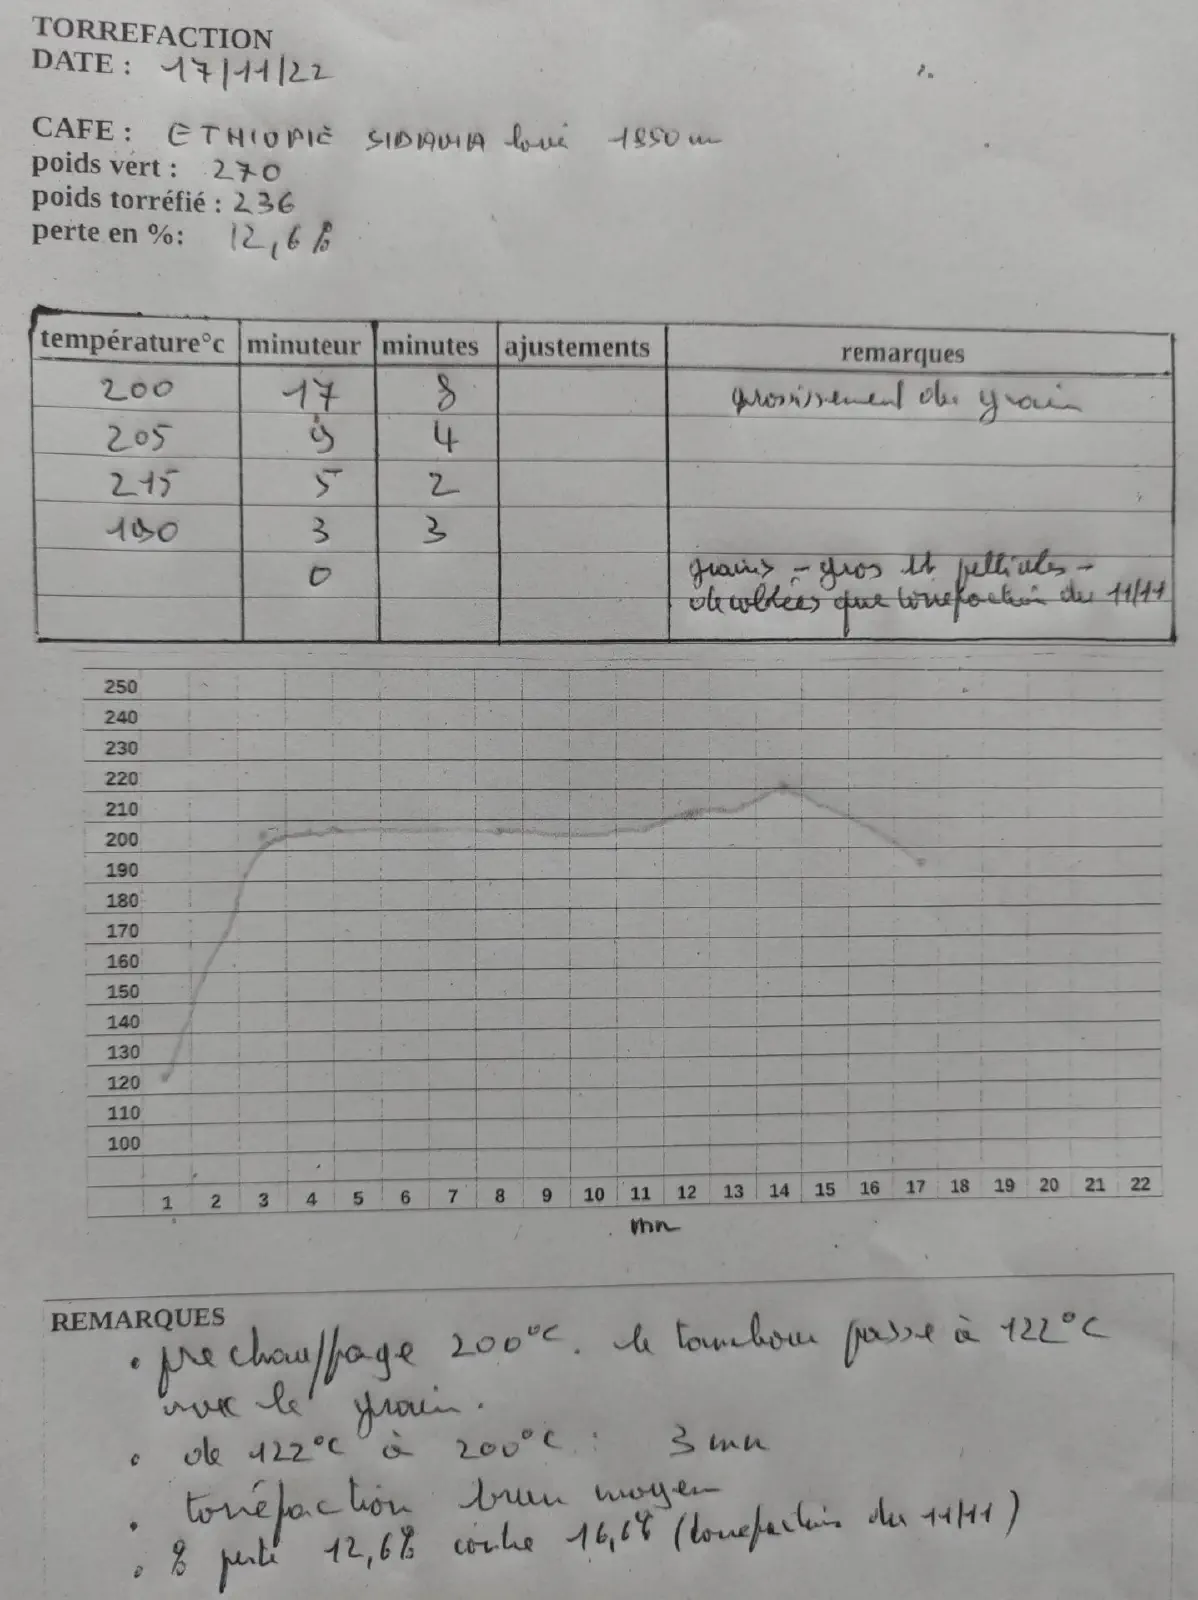
I also created my own roast curve tracking sheet, noting time, temperature and observations. This helps me refine my roasting profiles.
My First Roasts
Two attempts, two very different results:
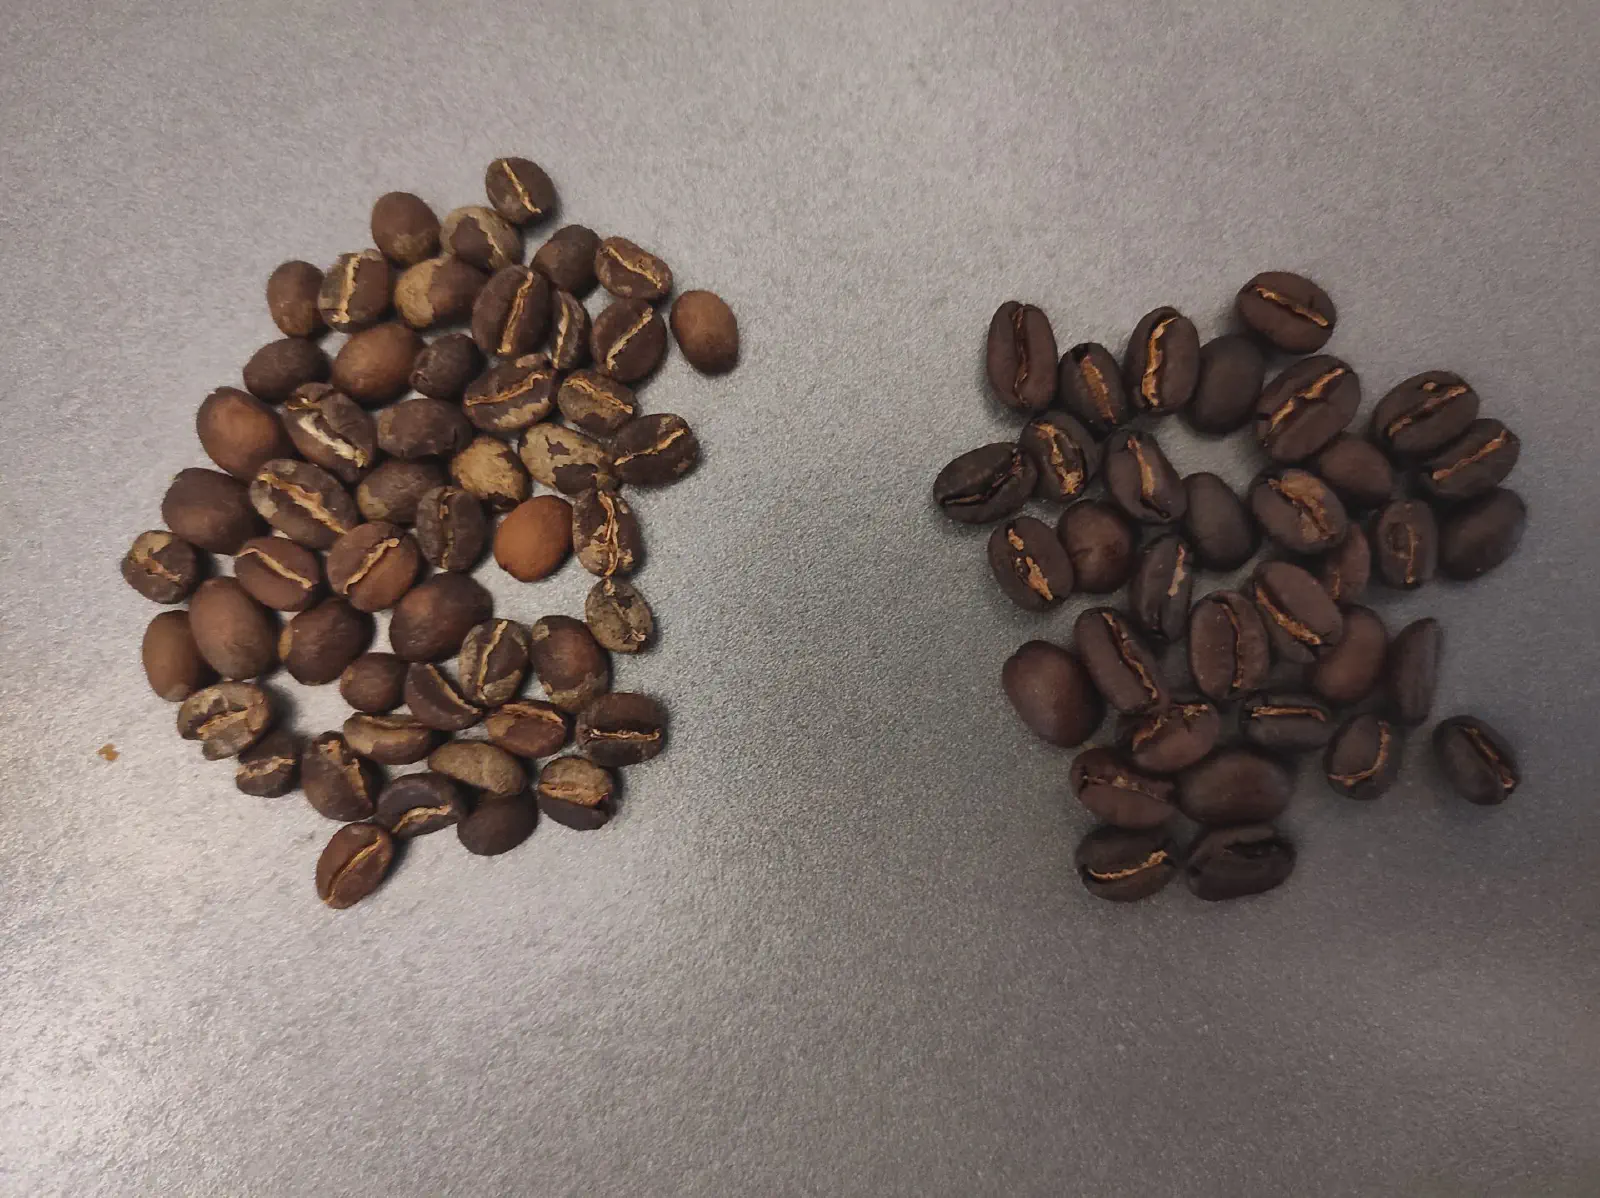
- 11/11: very dark coffee, full-bodied, Italian espresso style.
- 17/11: lighter coffee, tangy, with more pronounced aromas.
The GeneCafé CBR 101 proves to be efficient, quiet and consistent. It separates the chaff into a compartment that’s easy to clean.
Minor drawback: the drum is difficult to handle when hot during loading.
In conclusion, roasting is a fun, enriching and educational practice.
With a device like the GeneCafé CBR 101, it is possible to discover, experiment and refine your own roasting profiles at home.
If you are passionate about coffee, don’t hesitate to embark on this sensory adventure!
