How to Connect Your Coffee Machine with a Smart Plug?

Transform your morning routine by adding a smart plug to your coffee machine, making it easier to use while ensuring safety and efficiency. This article highlights the benefits of this technology, including improved home safety and reduced energy consumption. Start your days with coffee ready to enjoy, and benefit from unparalleled peace of mind every morning.
The digital era has profoundly transformed our morning rituals, particularly in preparing our coffee. By connecting your coffee machine to a smart plug, you benefit not only from unparalleled convenience, but also from optimized safety. Adopting this smart technology in our daily lives makes your routine both simpler and more personalized. Imagine waking up each morning with your E61 machine already preheated, ready to use, or leaving your home with complete peace of mind, without the slightest worry of having forgotten to turn off your La Pavoni machine.
This article guides you step by step to easily connect your coffee machine to a smart plug, reinventing your morning experience with a touch of modernity and efficiency.
What are the benefits of connecting your coffee machine?
Enhanced safety
Some espresso machines like the La Pavoni require special attention, as they do not automatically turn off after a certain time. If left on by mistake, they can remain active until the boiler water completely evaporates, thus risking damage or, in the worst case, causing a fire.
A smart plug offers an effective solution to this problem. By configuring it to automatically turn off the machine after a set duration, you significantly reduce the risks of overheating or fire, while extending the lifespan of your espresso machine.
This way, you can leave your home with peace of mind, knowing that you have the ability to check on your phone whether the machine is off or still running.
Energy savings with a smart plug
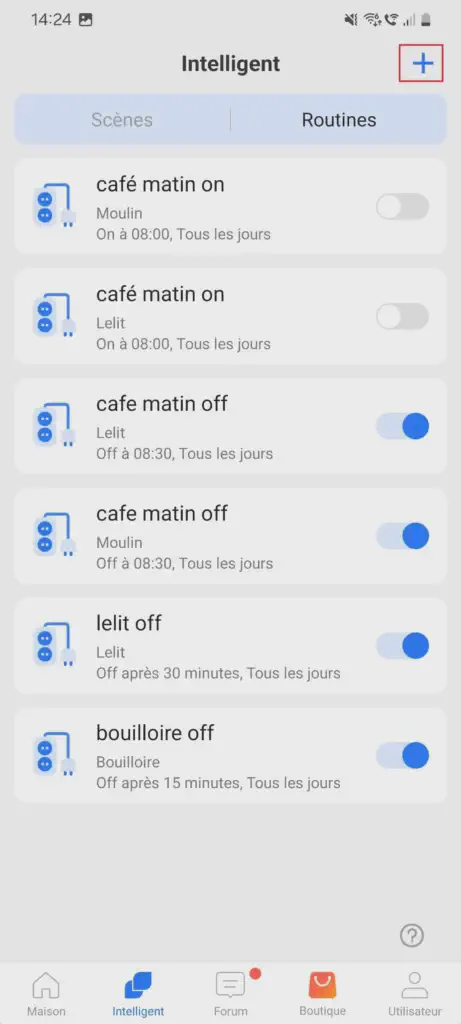
Using smart plugs presents a significant ecological advantage. They cut power to devices in standby mode, thus limiting energy waste from power supplies constantly under tension. It’s a simple but effective approach to reduce your carbon footprint and save on your electricity bills. Personally, I’ve connected my grinder and my coffee machine to a smart power strip.
This way, I can activate them simultaneously either through time scheduling or with a voice command such as “Alexa, turn on my coffee machine”. Thanks to this setup, the power supply of my Lelit Mara X V2 coffee machine and my electric coffee grinder is not powered with electricity when I’m not using them.
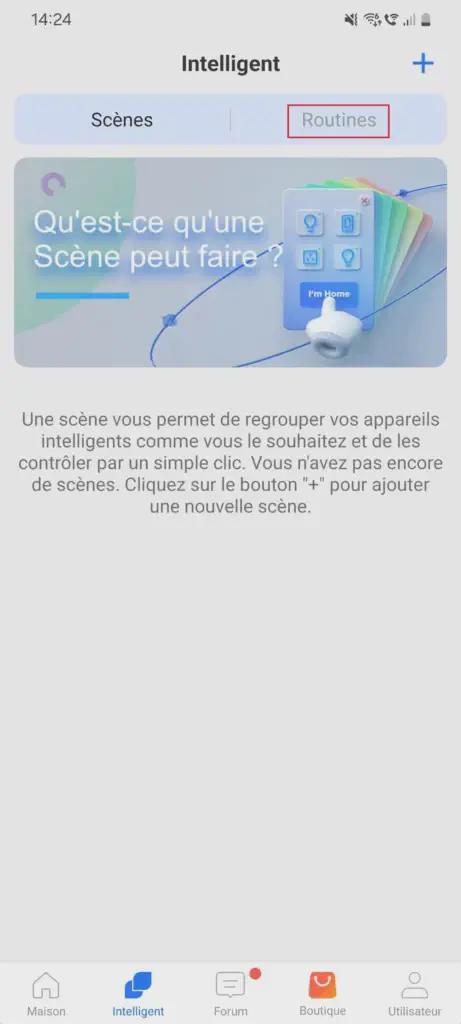
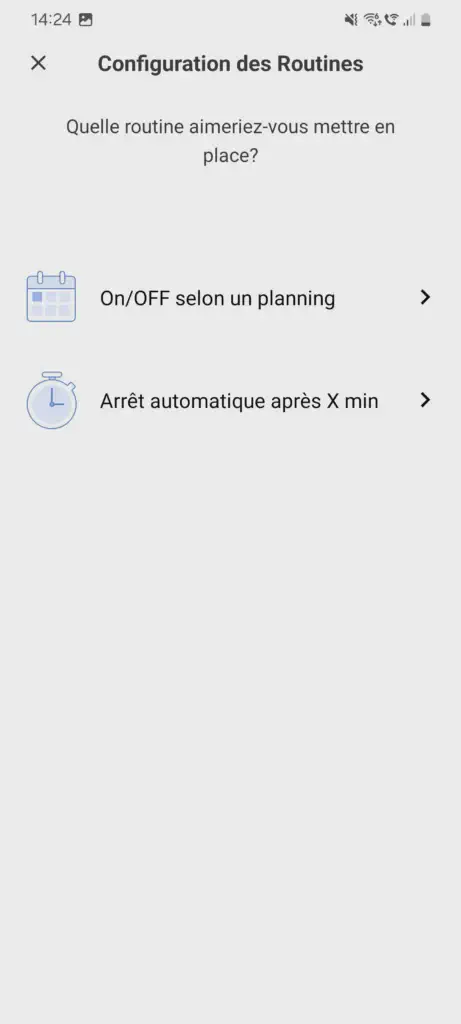
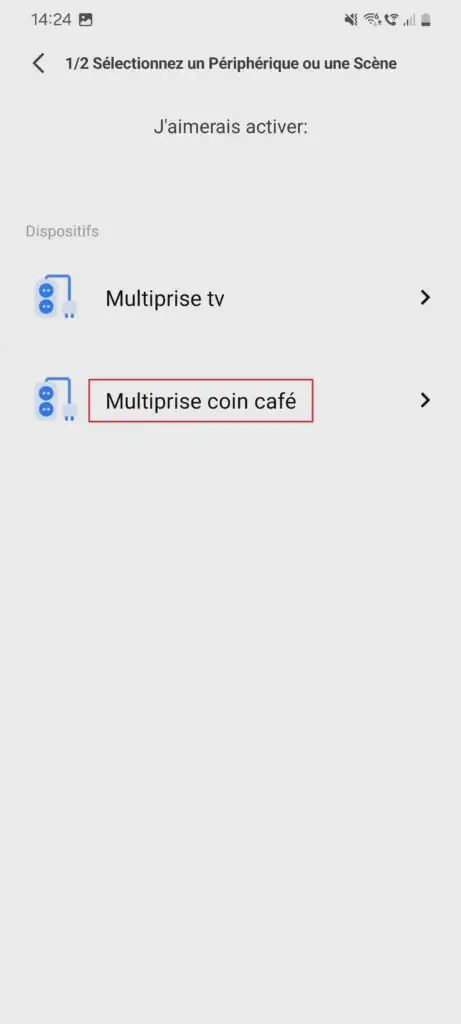
How to choose your smart plug / power strip?
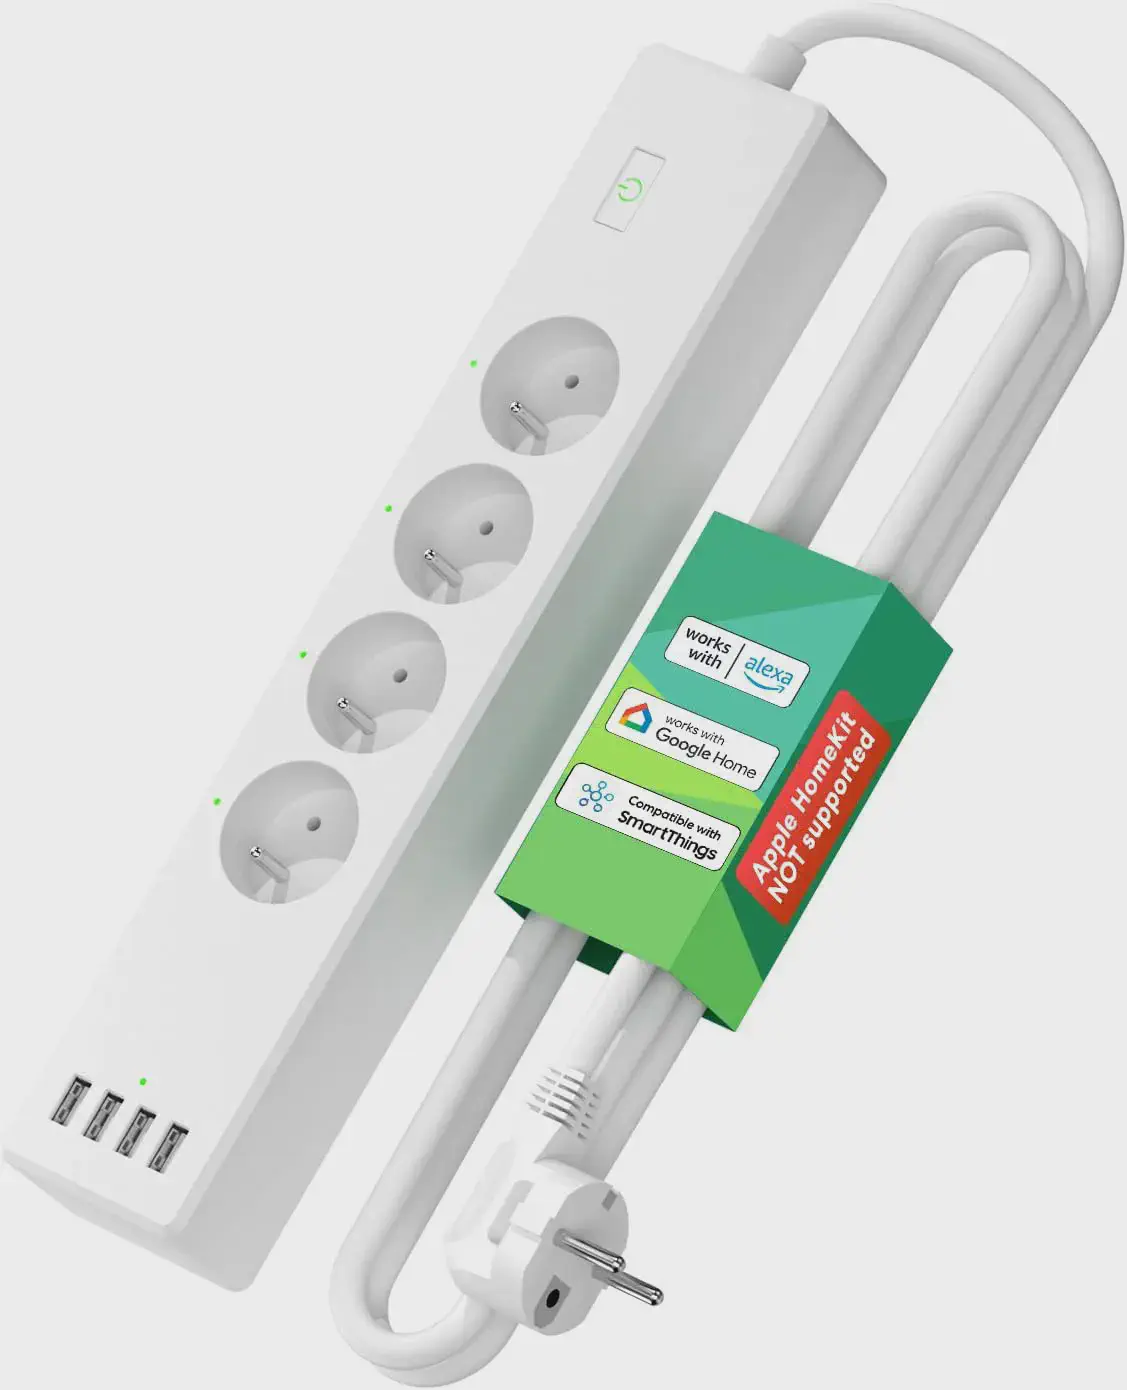
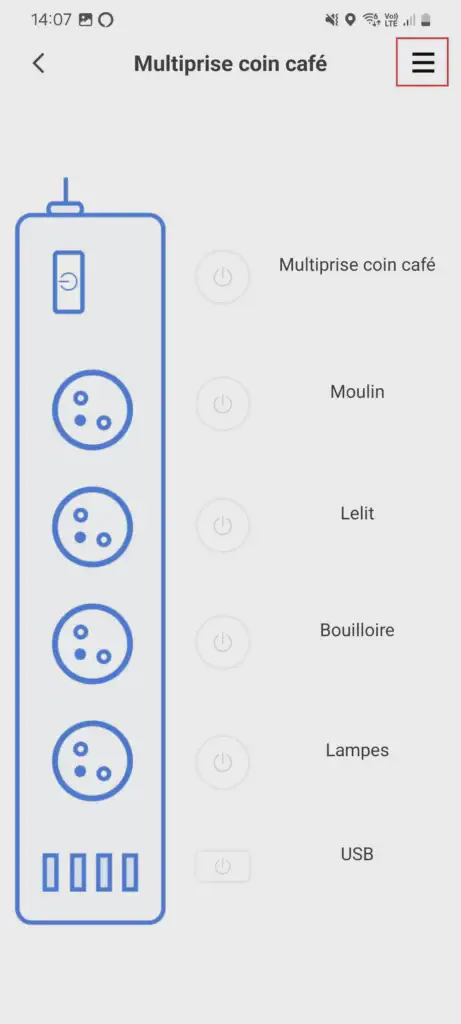
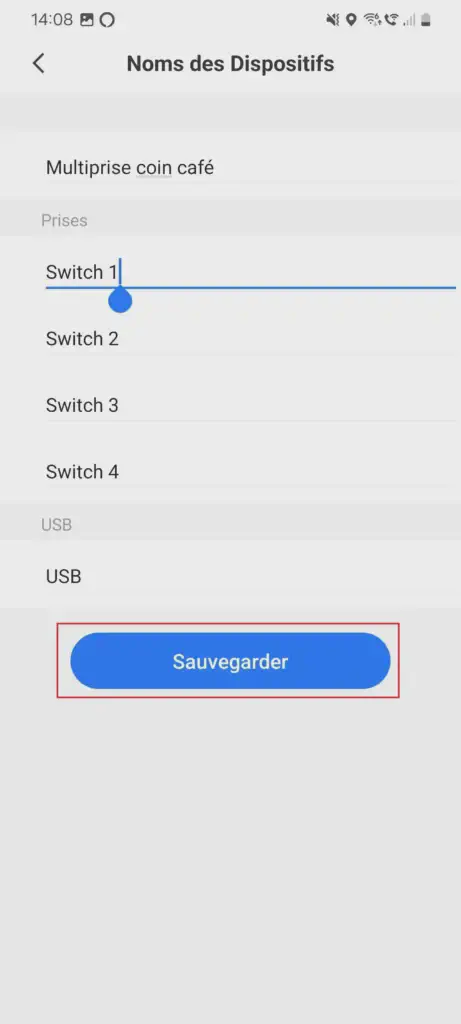
In my coffee space, I chose to use a Meross smart power strip affiliate link, which has 4 outlets and 4 USB ports. Each outlet, as well as the USB block, can be controlled independently from one another. Moreover, this power strip is compatible with Alexa, Google Home and Apple HomeKit, which allows me to easily control it through these platforms.
What particularly appealed to me with this Meross plug is the ease of installation and the ergonomics of the application (available on Android and iOS), very intuitive to use. Moreover, I appreciate the ability to choose whether the LEDs, indicating the power supply to the outlets, remain lit or not, thus offering additional customization suited to my preferences.
Tutorial: Installing a Meross smart power strip
Prerequisites
Meross smart power strip
Smartphone or tablet
Wi-Fi connection
Meross app from the App Store or Google Play Store
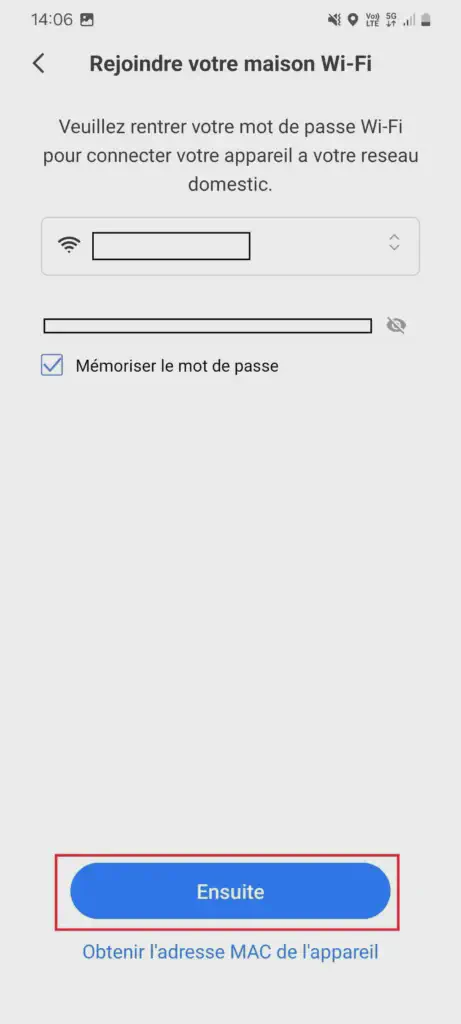
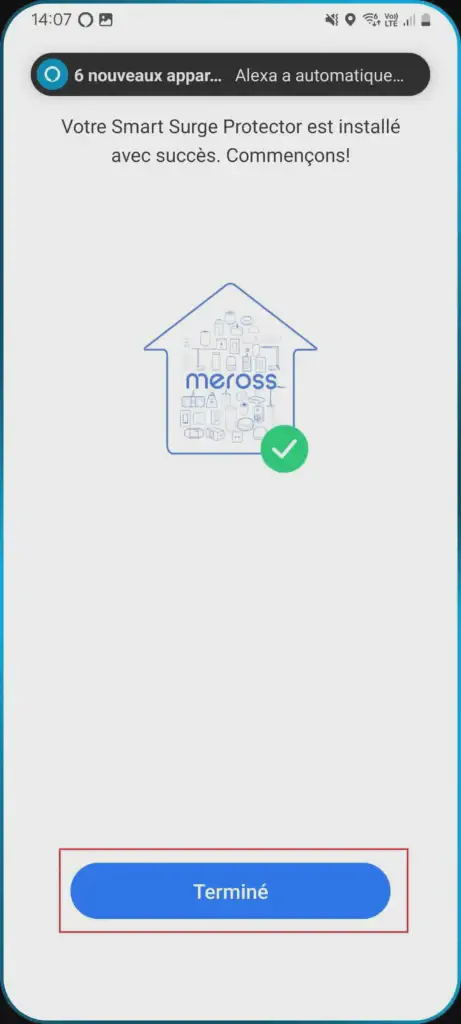
Open the app once installed.
Create a new account by following the on-screen instructions (or log in if you already have an account).
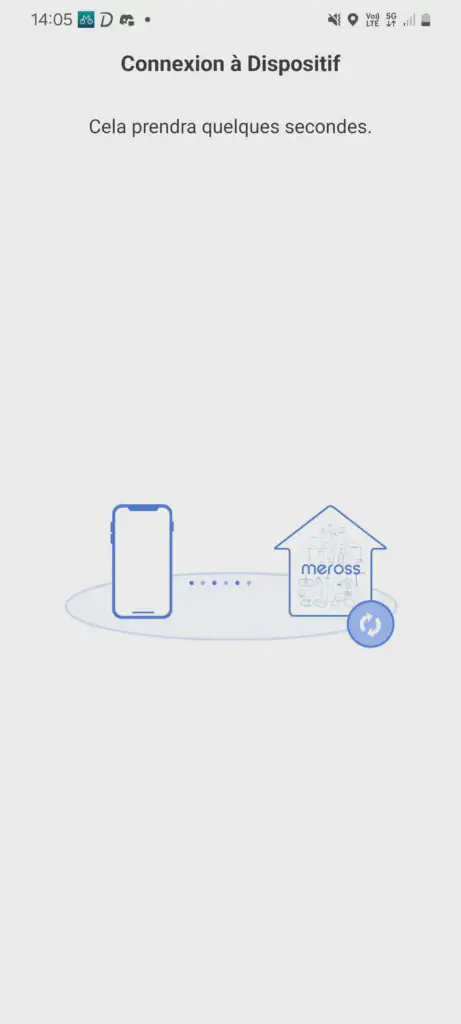
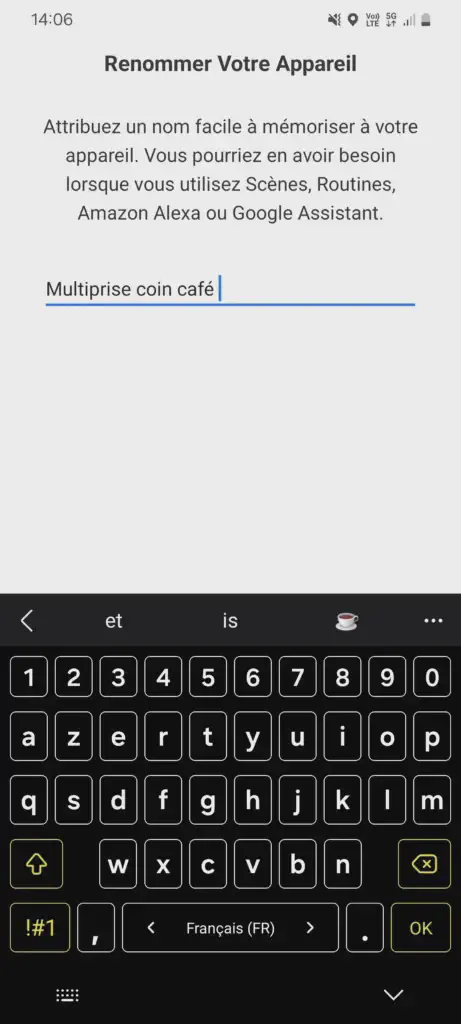
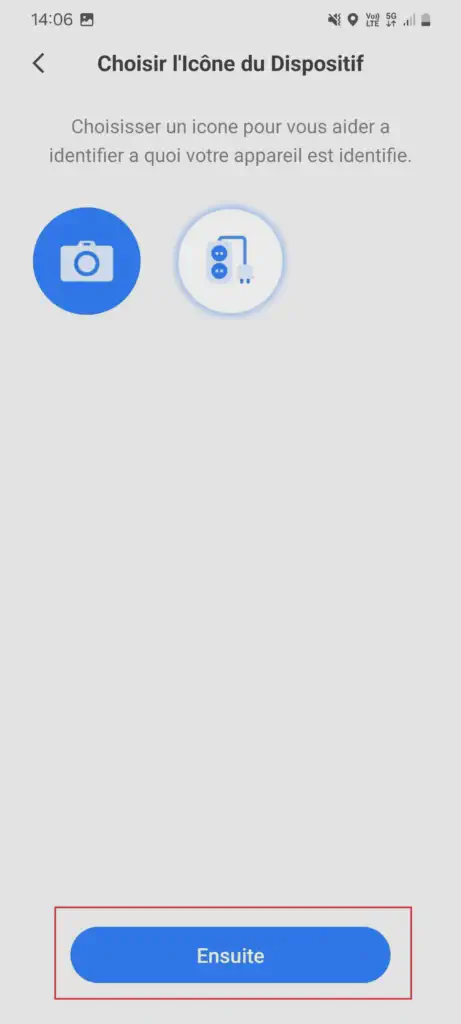
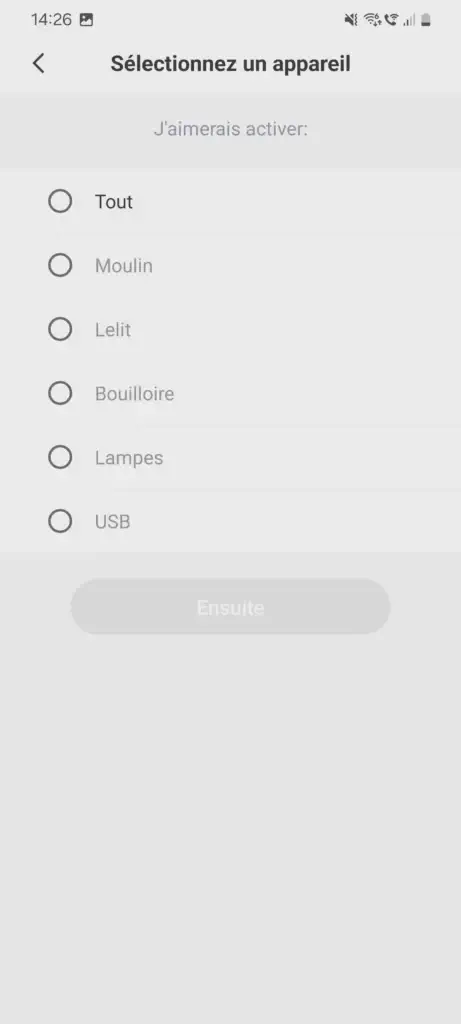
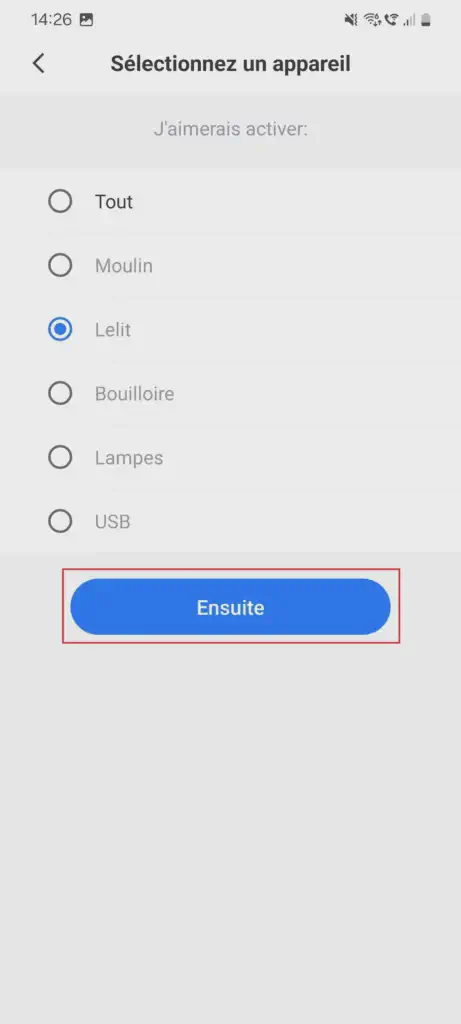
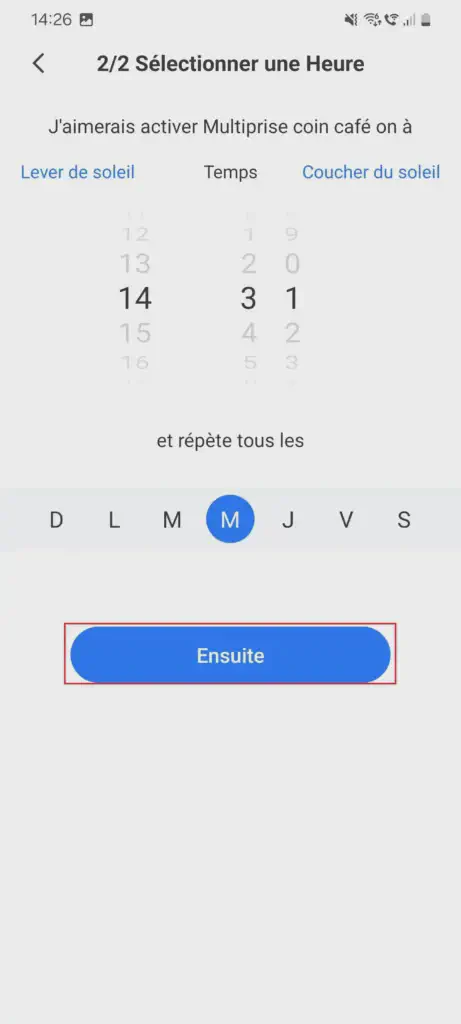
Follow the steps as shown in the images below
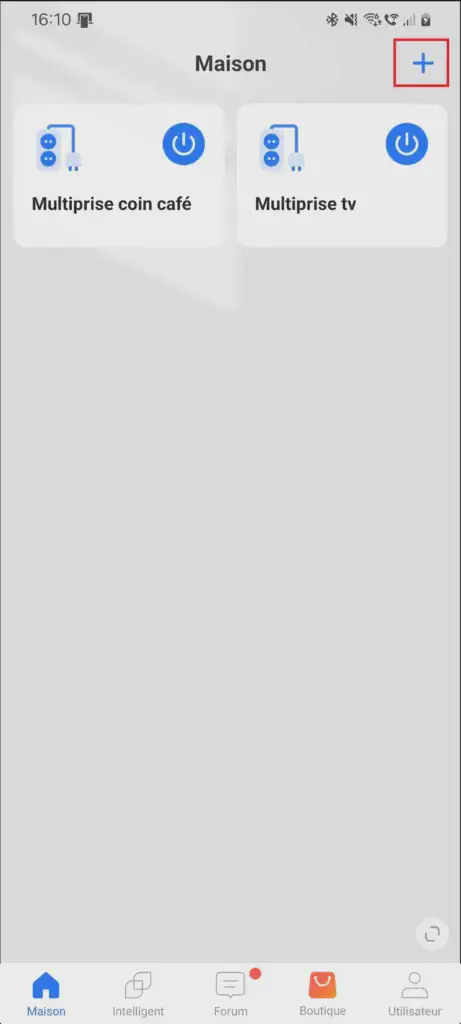
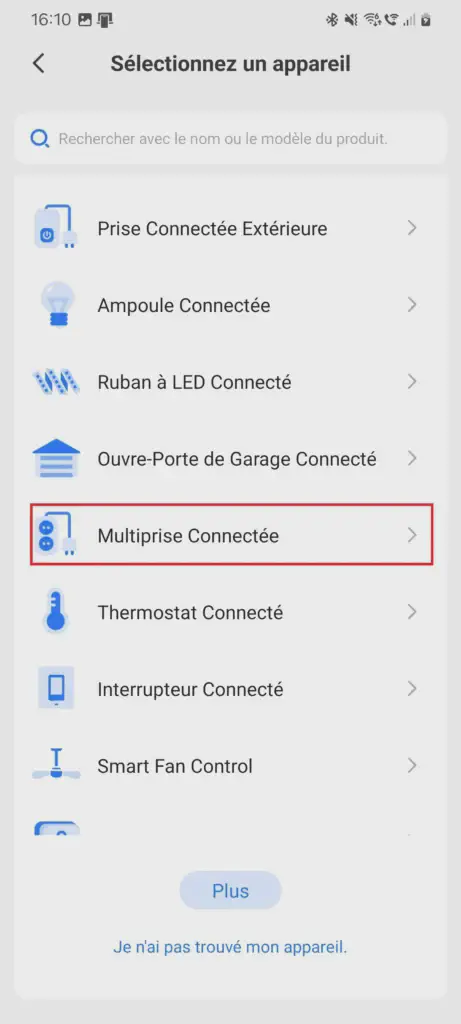
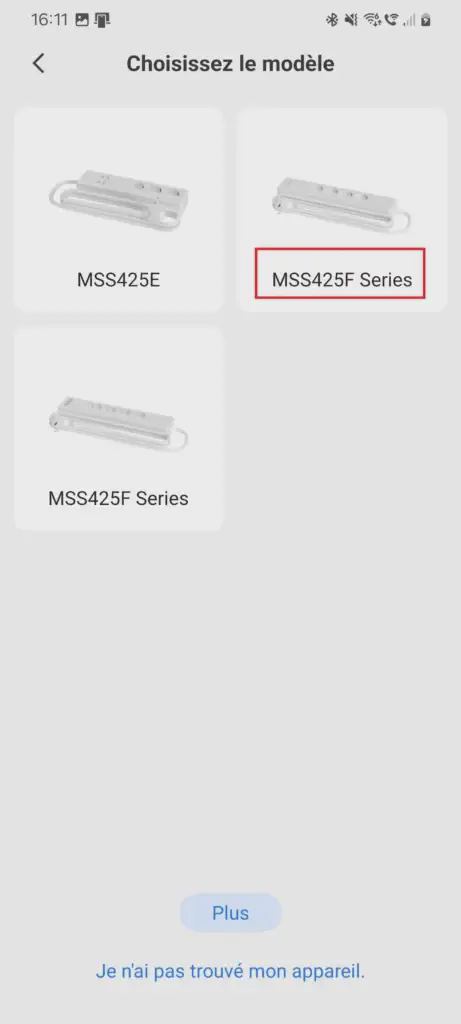
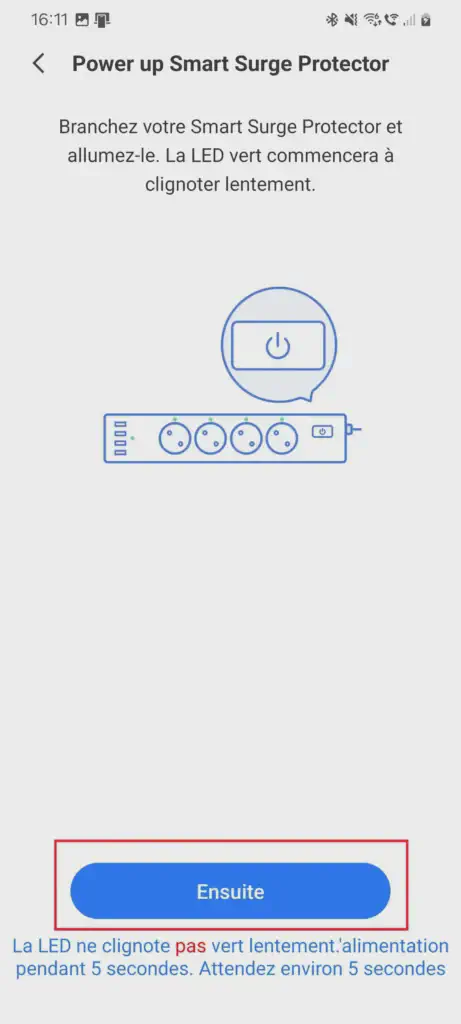
Tutorial: installing a Meross smart power strip
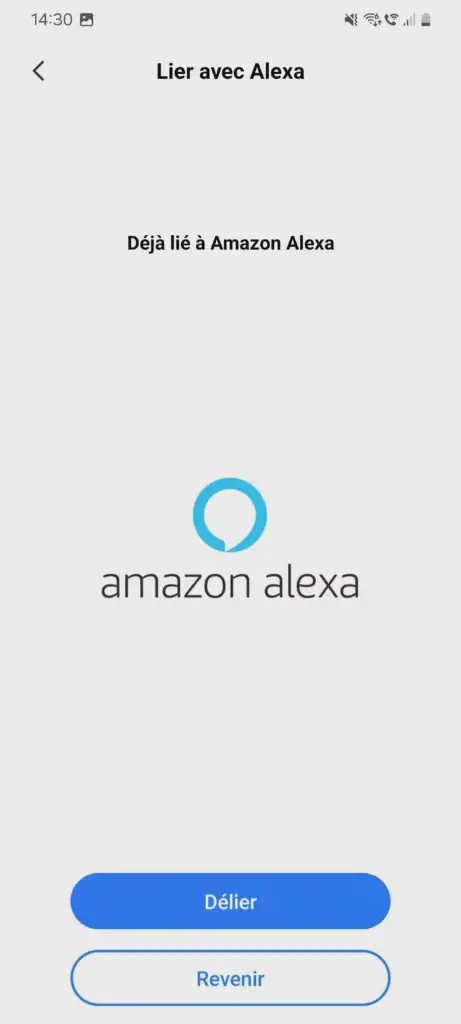
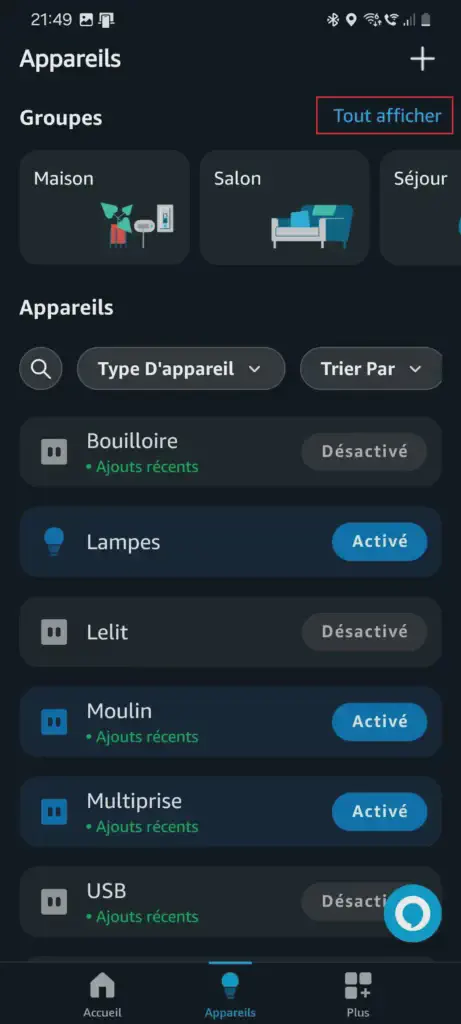
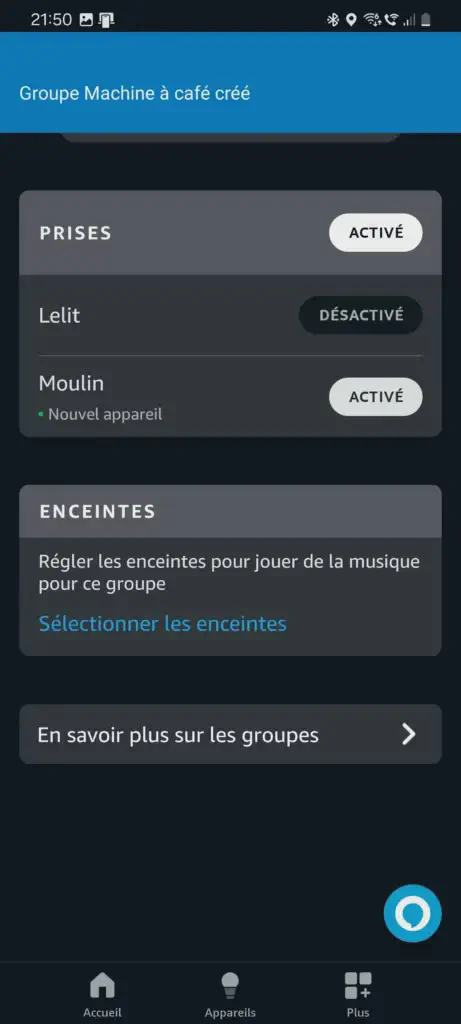
Pairing a Power Strip with Alexa
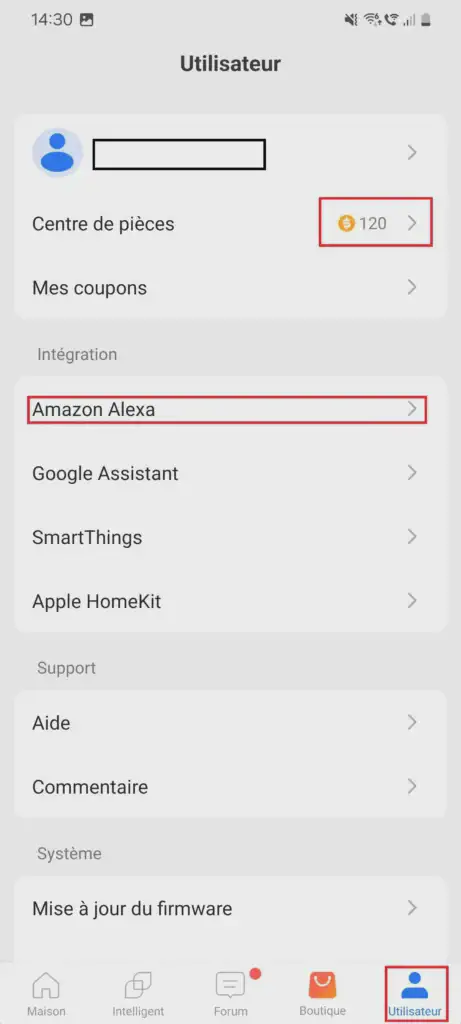
To pair the Meross power strip with Alexa, go to:
- User
- Amazon Alexa
For a simple smart plug, opt for the Tapo P110 (energy monitoring) affiliate link, economical and equipped with energy consumption tracking. Personally, I use the Tapo P110 to control various devices and I’m completely satisfied with it. This plug is Alexa compatible and Google Home compatible.
Find a Tapo P110 smart plug on Amazon affiliate link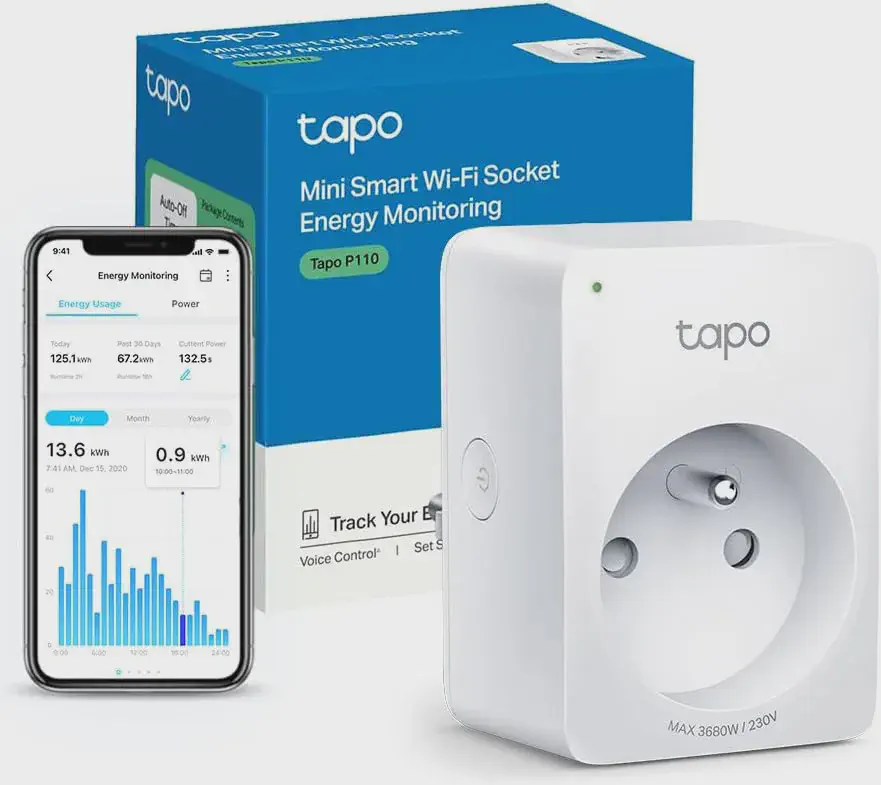
The Tapo P110 smart plug enables energy consumption tracking.
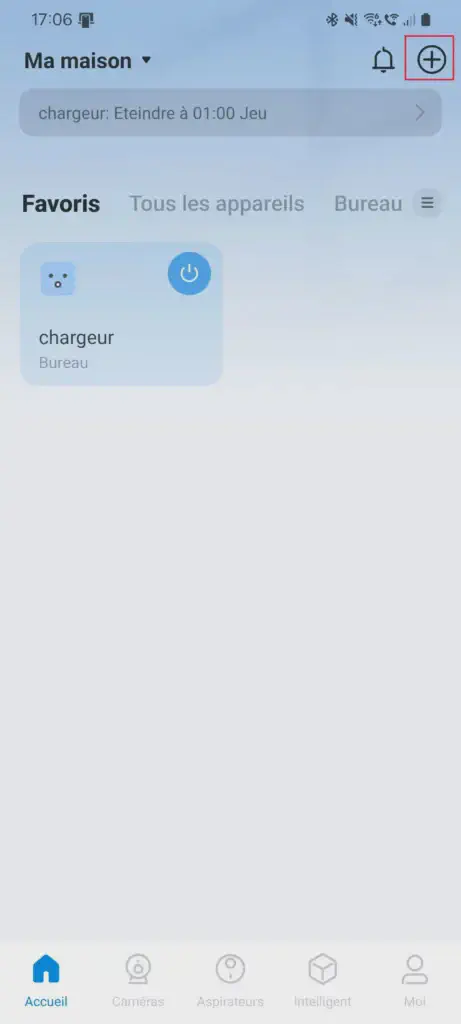
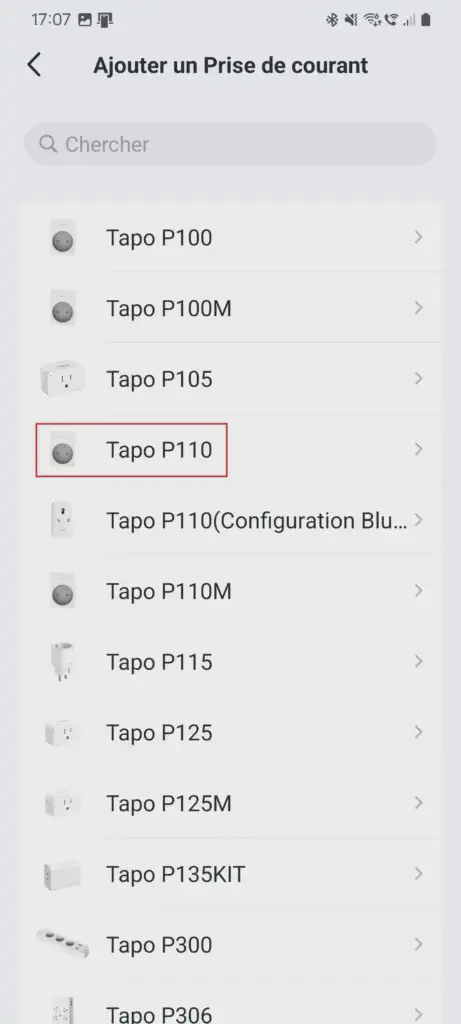
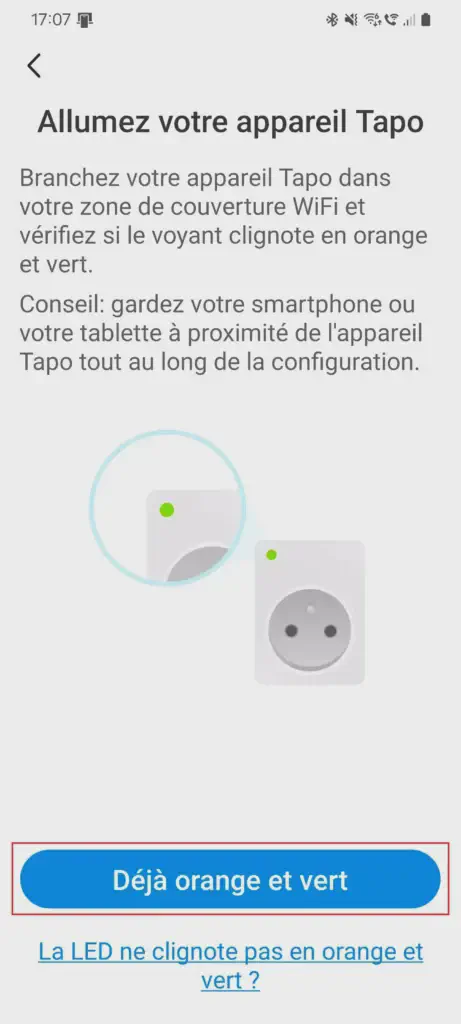
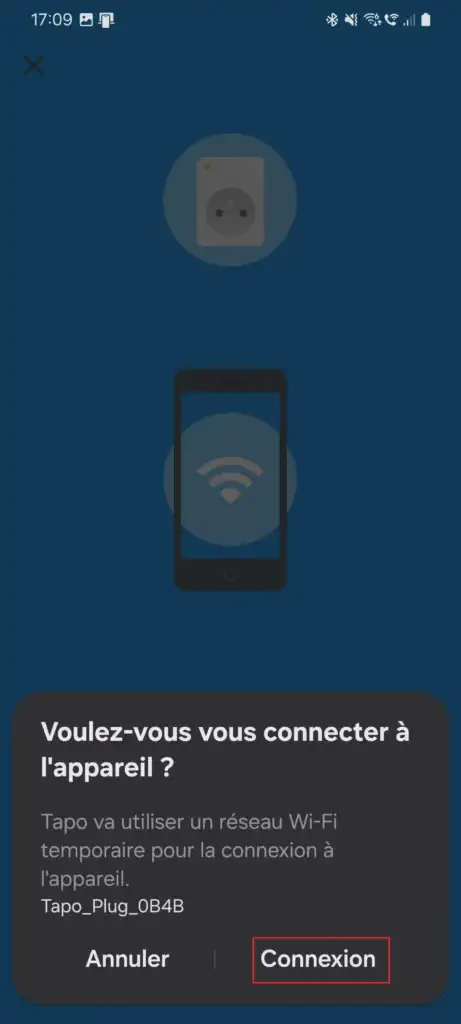
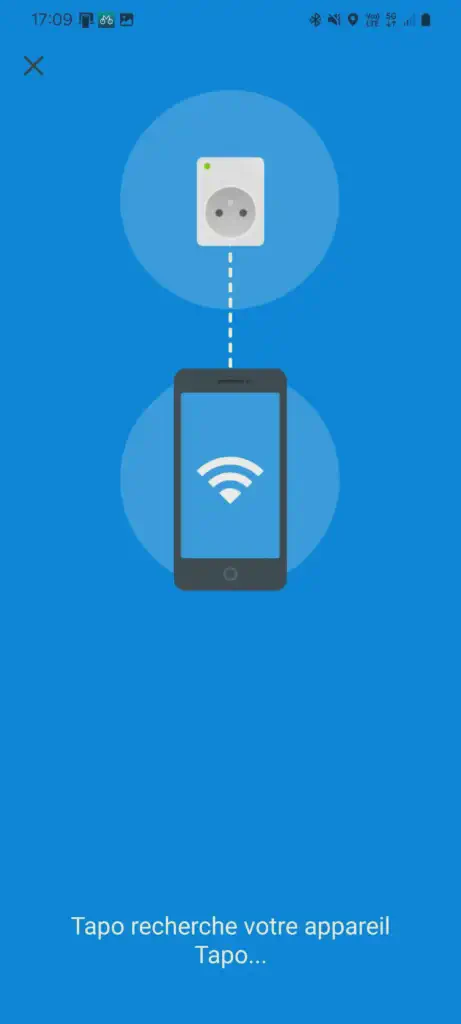
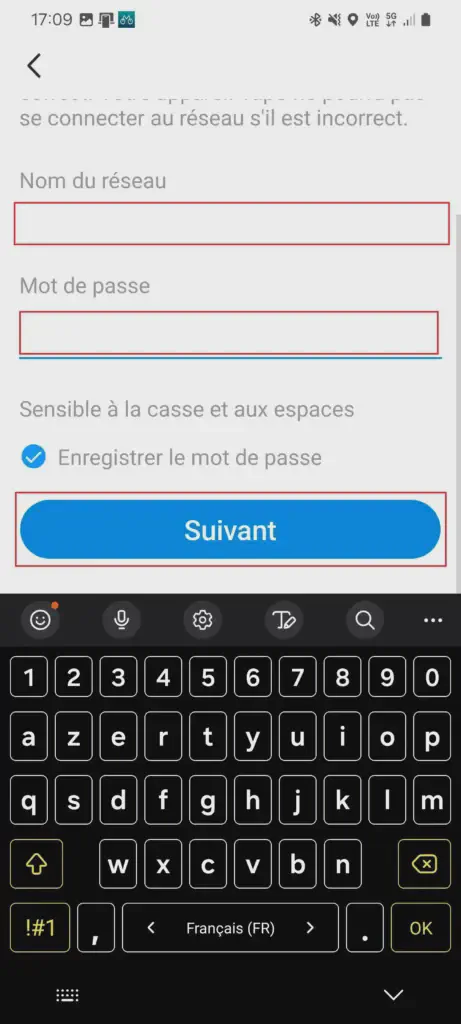
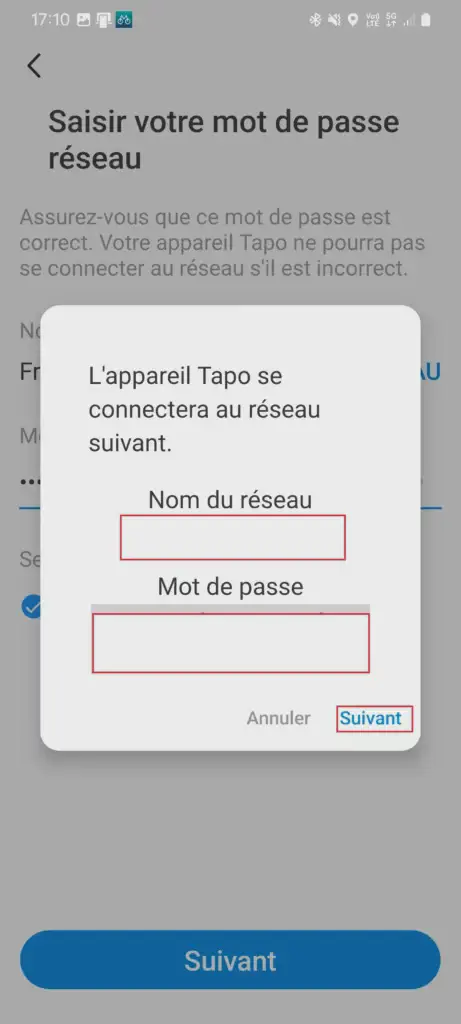
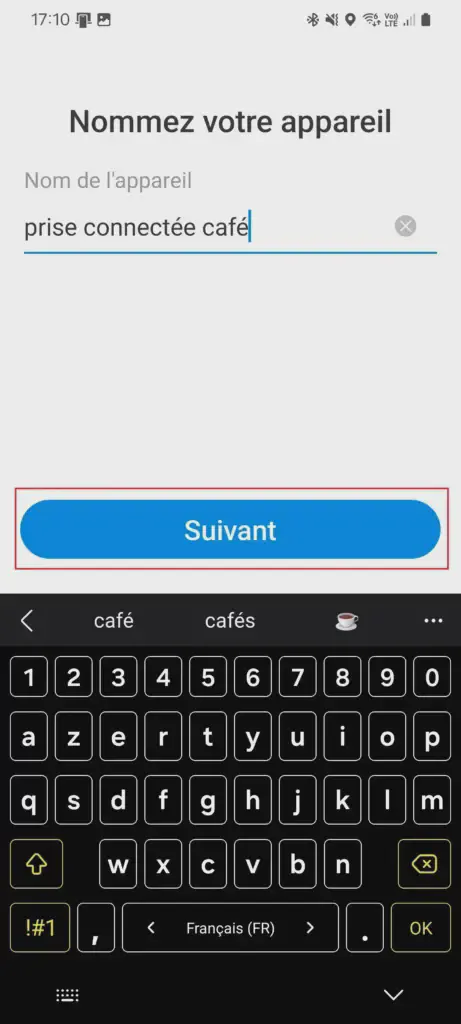
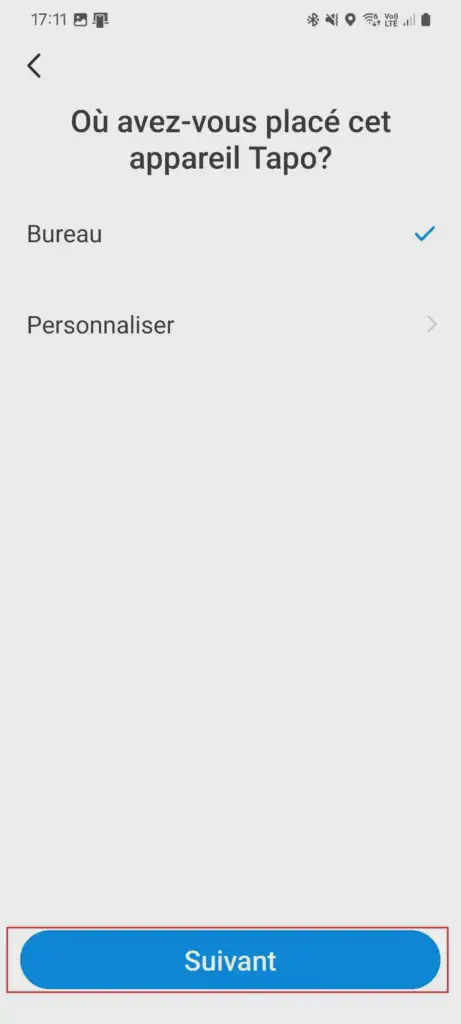
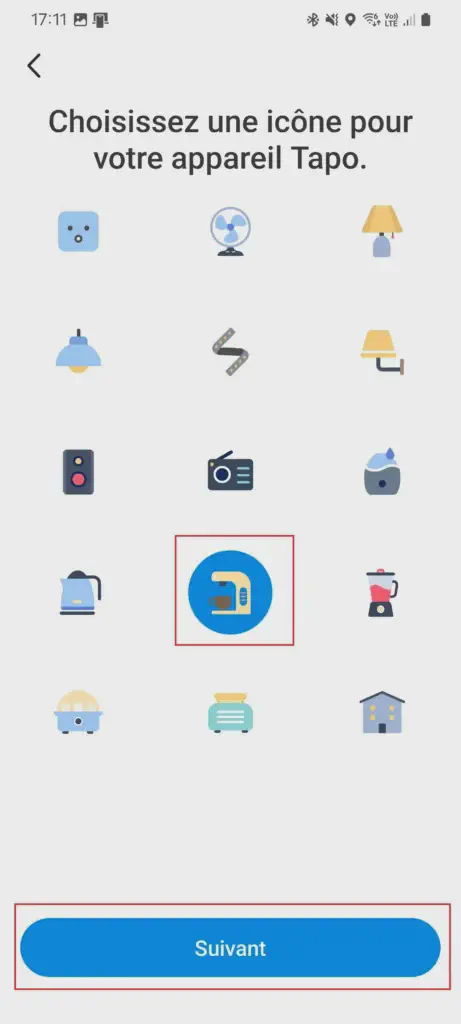
Tutorial: Installing a Tapo P110 Smart Plug (Click here to view detailed steps)
Tapo P110 Smart Plug Installation Tutorial
Required Equipment:
- Tapo P110 smart plug
- Smartphone or tablet
- Wi-Fi connection
- Plug it into a wall outlet of your choice.
- On your smartphone or tablet, download the Tapo app from the App Store or Google Play Store.
- Open the app once installed.
- Create a new account (or log in if you already have an account).
- Follow the steps as shown in the images below.


Controlling your smart plugs with a connected speaker
Connected speakers, such as Amazon Echo affiliate linkand Google Home, easily sync with smart plugs, enabling direct and intuitive voice control.
My experience with an Alexa smart speaker from Amazon Echo Dot is a perfect example. I created a Routine that activates my coffee machine before I wake up, ensuring my Lelit preheats as soon as I arrive in the kitchen. I also set up other routines such as “the France Info news flash” followed by “the weather”, allowing me to listen to the news while having breakfast. In short, many features are available. You can even find Podcasts about coffee.
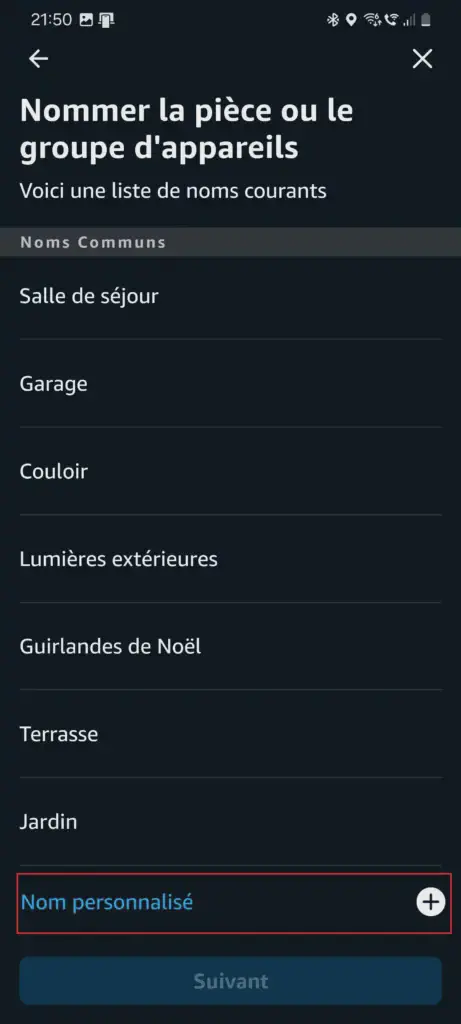
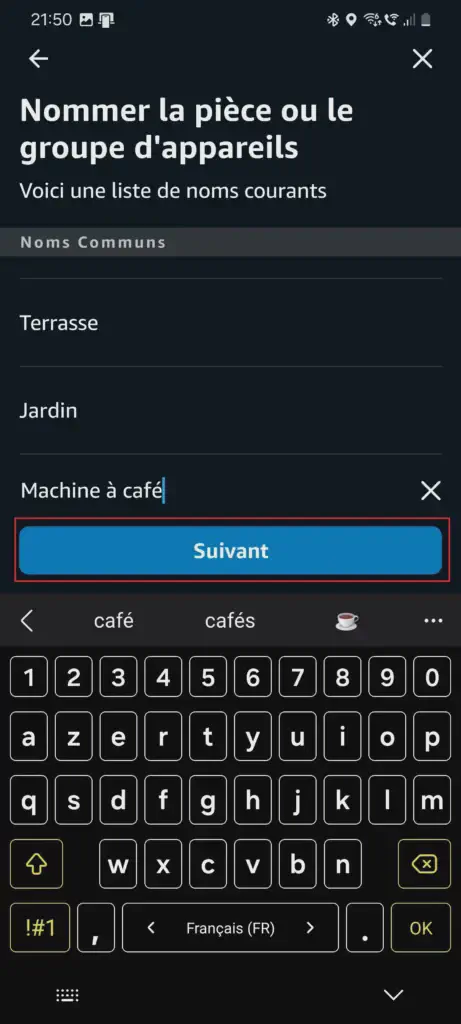
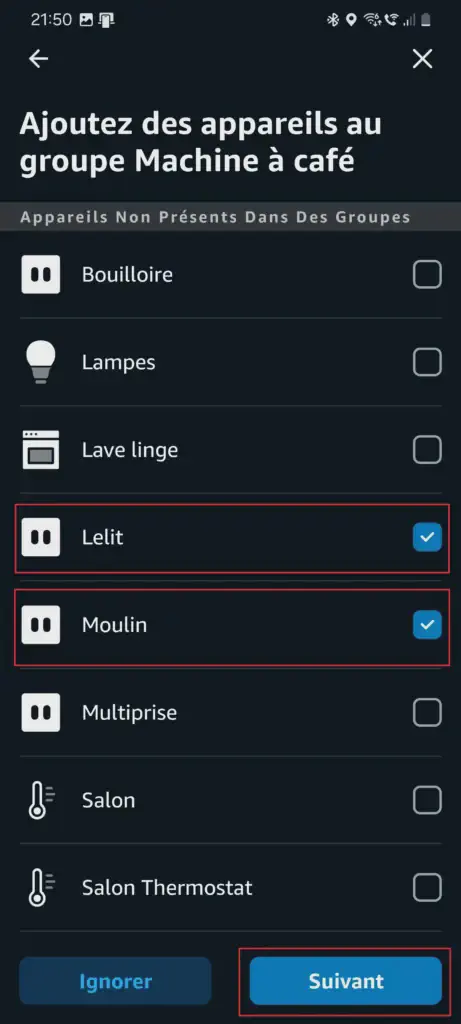
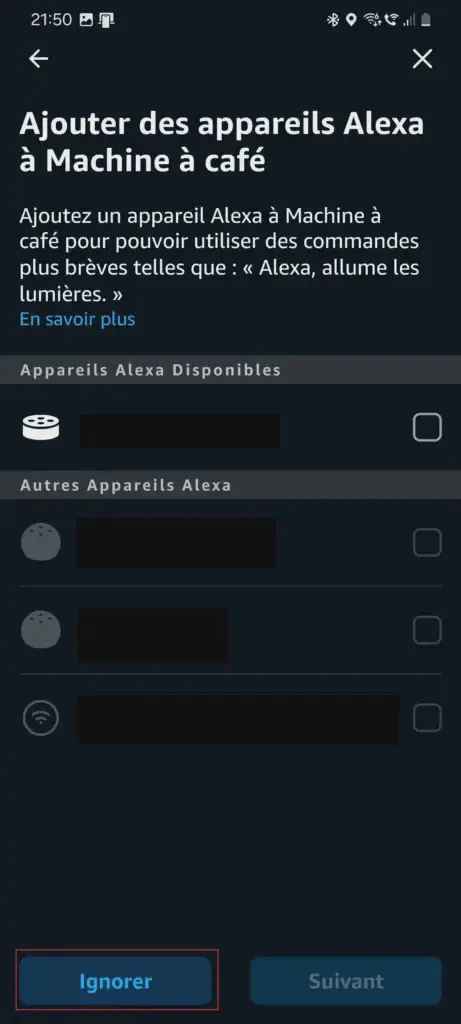
How to pair a smart plug with Alexa?
To pair a smart plug with Alexa, nothing could be simpler. Follow the steps below in the Alexa app (available on the Google Play Store and the App Store).
It’s thanks to Alexa that I voice control my equipment to turn them on or off. Without this integration, using voice commands is impossible, and controlling connected devices is limited to the smartphone app.
Beforehand, you need to install the Skill corresponding to your plug. Refer to the tutorials above.


Conclusion
You now have a connected coffee machine. For any questions or clarifications, feel free to comment.
